Choose a source
Choose the right mode
Use Text to image when the picture begins with an idea. Use Image Edit when a photo, product, person, pose, layout, or style reference must guide the result.
Create or edit an image in four steps: choose Flare or Sunburst, prepare the prompt or references, set one of five quality tiers and 1K to 4K output, then inspect the result.
Use either selectable model for image creation or reference-led editing, with five quality tiers and output from 1K to 4K.
On gptimage.tools, you use GPT Image 2.5 through a browser workspace. Text to image turns a written brief into a new visual. Image Edit combines your instructions with uploaded references. Both routes finish in the same place: a preview that you inspect before downloading the result.
The workspace exposes Flare and Sunburst, up to 16 references, fifteen canvas ratios, five quality tiers, 1K, 2K, or 4K resolution, and PNG, JPEG, or WebP output. The Generate button calculates the required credits from the selected model, quality, and resolution.
Make four decisions before you start. Each one changes the source material, composition, level of detail, or displayed credit cost.
Use Text to image when the picture begins with an idea. Use Image Edit when a photo, product, person, pose, layout, or style reference must guide the result.
Name the asset first, then describe the subject, setting, composition, lighting, colors, exact visible wording, and anything the image must avoid.
Choose the canvas ratio before generation. A banner, square product tile, and vertical story need different subject placement and different amounts of empty space.
Start with 1K and Low quality while testing the idea. Increase quality or resolution after the composition, wording, and reference choices are worth keeping.
A useful GPT Image 2.5 prompt guide begins with the job, not a style label. Name the asset, subject, setting, composition, lighting, colors, exact text, and constraints in that order. Put required wording in quotation marks and finish with details that must remain unchanged.
Browse prompt examplesBefore your first generation, reduce the brief to one sentence that another person could visualize without asking a question. Confirm the intended canvas, identify any exact wording, and decide which detail matters most. If you are editing references, label each image and write one short Keep list. Then choose an inexpensive draft setting. This preparation gives you a clear basis for reviewing the preview: you can compare the result with a defined subject, placement, text requirement, and protected detail instead of deciding only whether the image feels right.
Use the same controls for product scenes, posters, social images, infographics, interface concepts, storyboards, portraits, and reference-led edits.
Describe the product, backdrop, camera angle, materials, lighting, and room for copy. Quote short package or label text and inspect every character in the preview.
State the headline, reading order, number of sections, color system, and relationship between text and illustrations. Review the layout at its intended display size.
Describe the screen or panel count, hierarchy, repeated components, and interaction state. Treat the result as a visual concept that still needs product review.
Upload the visual that must anchor the result. Separate what changes from what stays, and keep the request narrow enough to compare against the source.
If you are learning how to generate images with GPT Image 2.5, begin with an output whose success criteria are easy to name. A product scene can be checked for product shape, surface, light, camera angle, and copy space. A reference-led edit can be checked against the original for the exact details you asked to keep.
Use this guide when you need a repeatable path from an initial idea or reference image to a reviewed, downloaded visual.
Follow the four steps without changing several variables at once. Save the prompt that produces the closest result.
Choose the ratio for the planned placement and inspect packaging, labels, hands, small objects, and reserved copy space.
Assign a clear role to each reference image, such as subject, style, pose, composition, or background.
Use direct change and keep instructions so a successful part of the source is not accidentally replaced.
This GPT Image 2.5 tutorial for beginners keeps every stage observable: one source decision, one prompt, one settings group, and one review checklist. Once that sequence works, you can reuse it for a different visual instead of guessing which change produced the result.
Choose a model and mode, provide useful instructions or references, set quality and resolution, then generate, inspect, and download.
Step 1
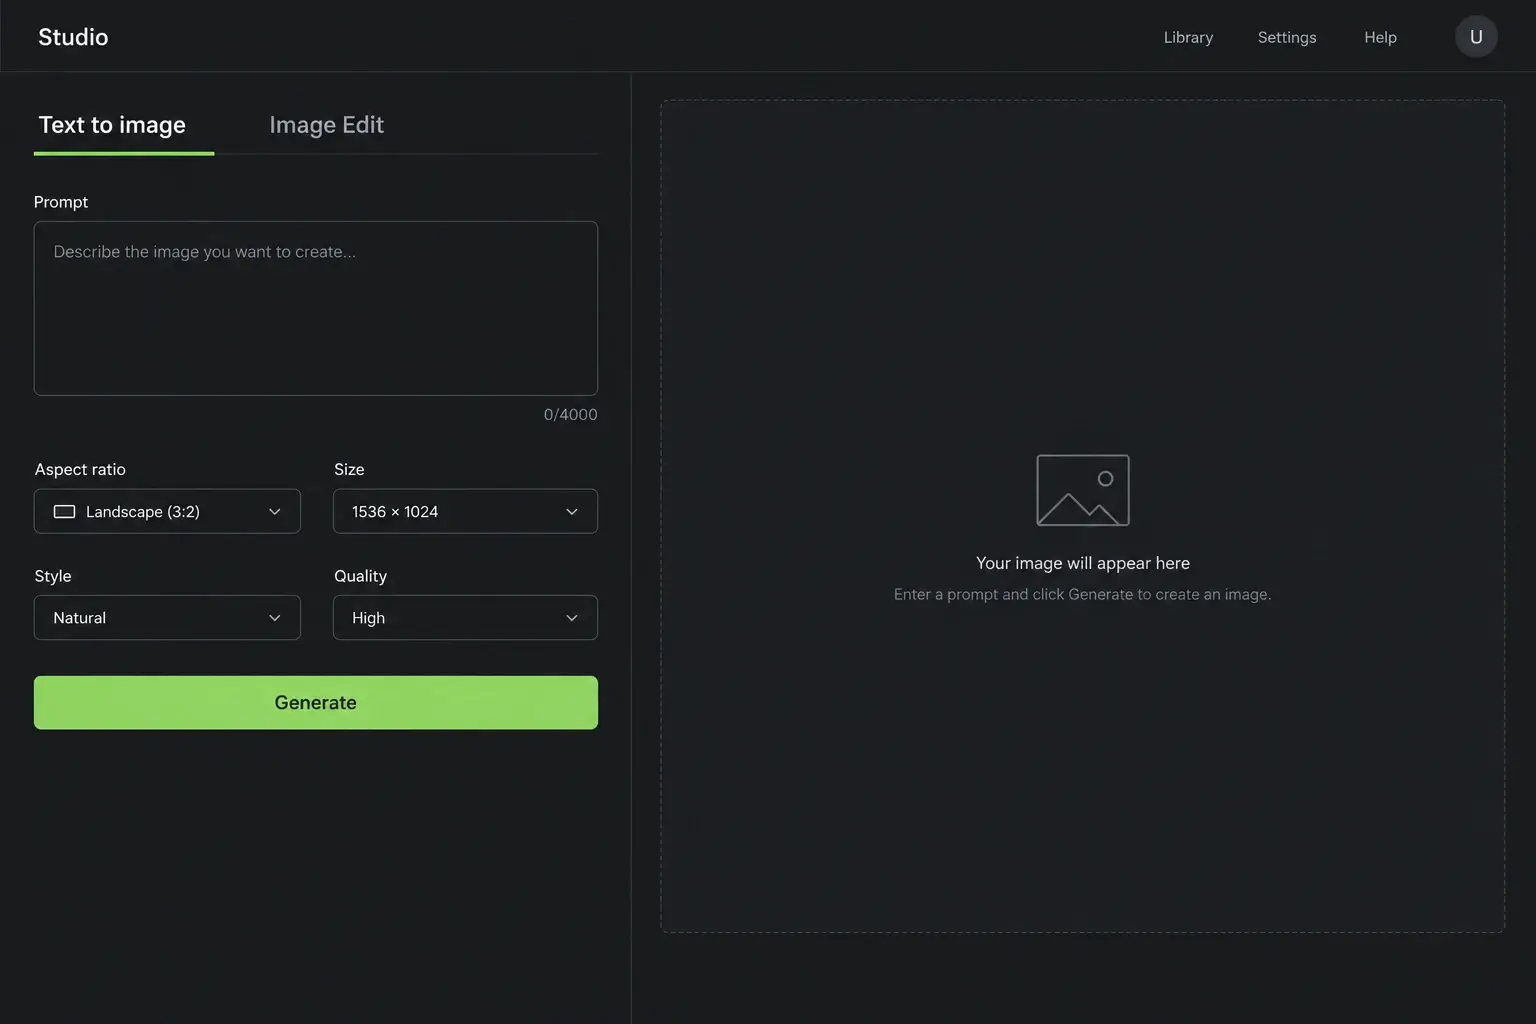
Select Flare or Sunburst, then decide whether the image starts from words or visual references.
Open the GPT Image 2.5 generator and choose Flare or Sunburst. Select Text to image when you want a new scene from a prompt. Select Image Edit when uploaded images must influence the subject, pose, style, composition, or background. The generator calculates credits from the selected model, quality, and resolution.
For a first text-to-image attempt, use one clear subject and one intended asset type. For example: “Create a horizontal editorial product image of a frosted glass skincare bottle on dark stone, with wet green leaves and soft side light. Leave clean negative space on the left. No logo, no watermark.” A concrete brief is easier to evaluate than a stack of unrelated style words.
Before moving on, write down where the image will appear. A website header, product card, presentation slide, and vertical story need different composition. Knowing the destination now will make the ratio decision in step three much easier.
Step 2
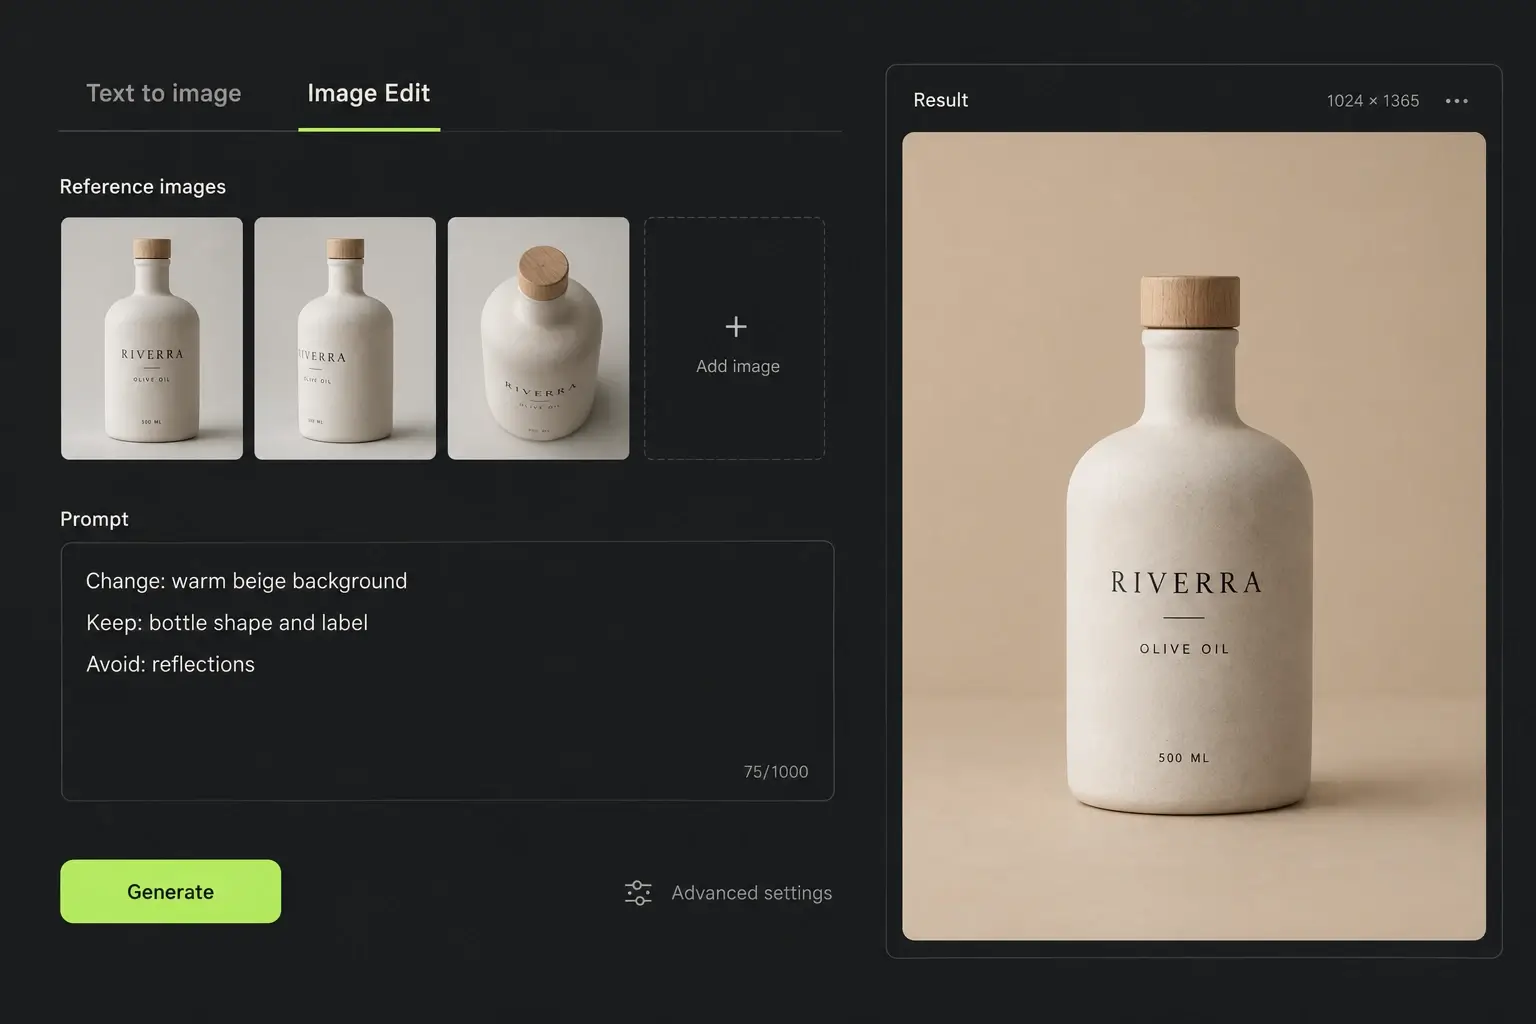
Give each reference a job, then separate change, keep, and avoid instructions.
In Image Edit mode, upload at least one reference image. The current workspace accepts up to 16 references. Use only images that have a clear purpose. Too many unrelated sources make it harder to explain which subject, pose, light, colors, or layout should guide the final result.
Identify each role in the prompt. A practical structure is: “Use Image 1 as the product reference. Use Image 2 as the lighting reference. Place the product in a dark stone setting. Change the background only. Keep the bottle shape, label position, camera angle, and proportions unchanged. No extra objects.” This structure tells GPT Image 2.5 what to borrow and what to protect.
Put exact visible wording in quotation marks and describe where it belongs. Keep requested text short enough to inspect. For edits, use separate Change, Keep, and Avoid sentences. If the first result is close, change one instruction at a time so you can identify which revision improved the image.
Step 3
Match the canvas to its destination and the output settings to the stage of work.
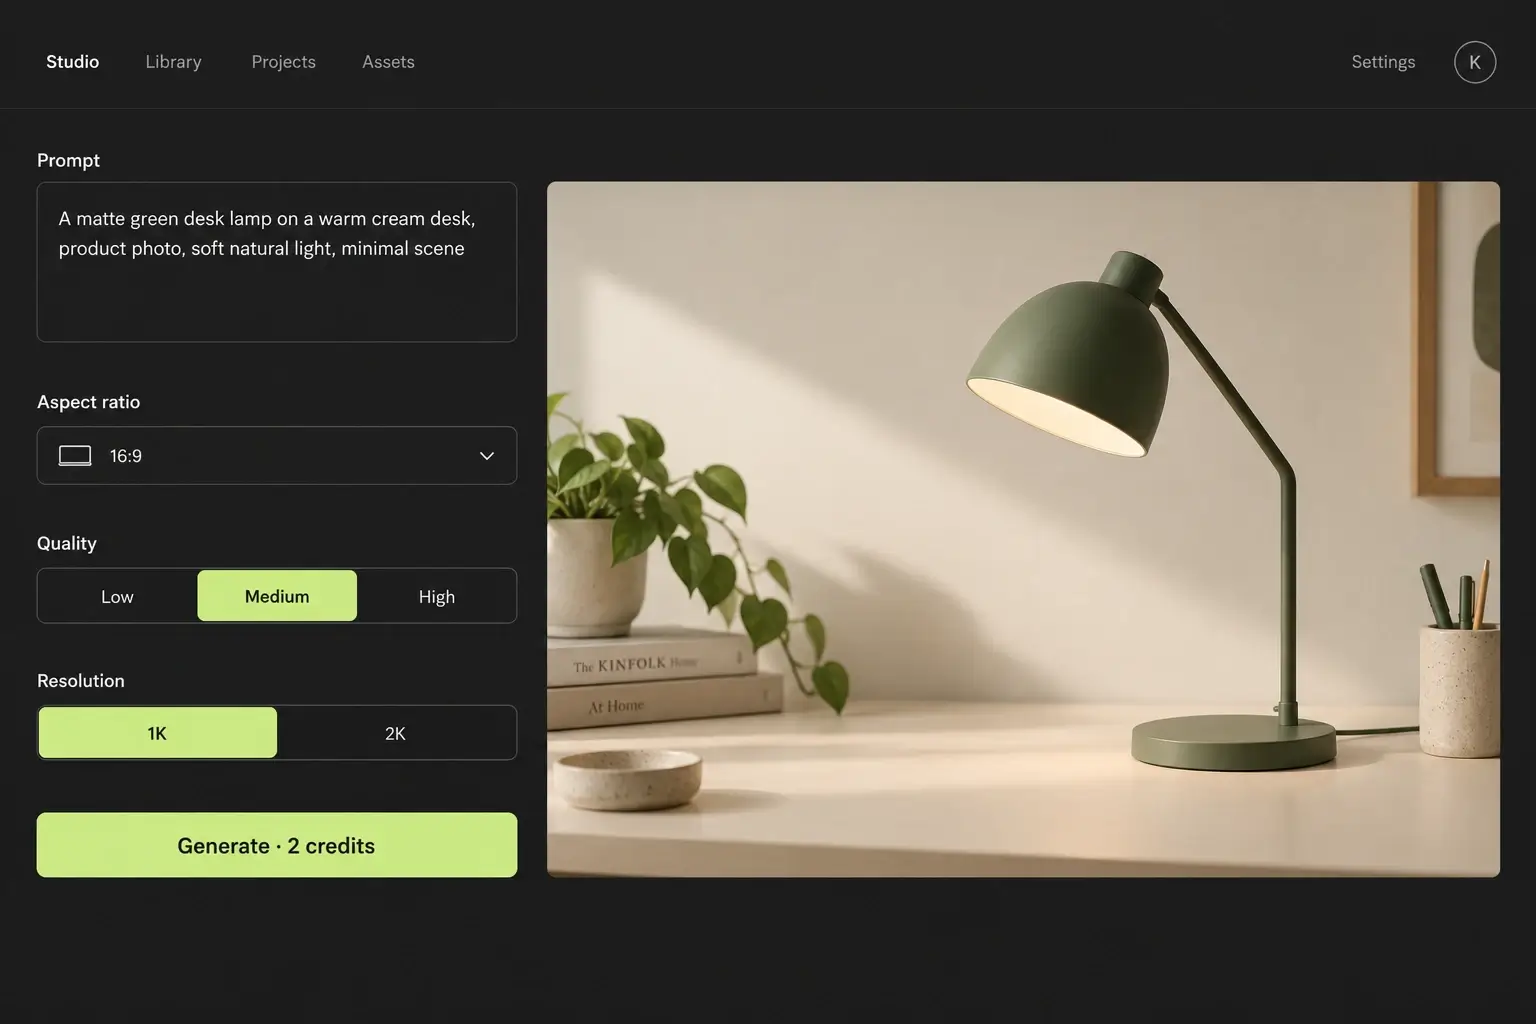
Choose the ratio before generation because the canvas affects subject placement and empty space. The current interface includes fifteen ratios: 1:1, 3:2, 2:3, 3:4, 4:3, 4:5, 5:4, 9:16, 16:9, 21:9, 2:1, 1:2, 3:1, 1:3, and 9:21. Use 16:9 for a wide header, 1:1 for a square placement, and 9:21 for an extra-tall composition.
Next select Low, Medium, High, XHigh, or Max quality, choose 1K, 2K, or 4K resolution, and set the file to PNG, JPEG, or WebP. Start with Low and 1K when testing the subject, framing, or prompt direction. Move to a higher setting only after the layout is close.
The Generate button displays the required credits for the selected model, quality, and resolution. Read that amount again after changing any of those fields. The live button is the final source of truth for the run you are about to start.
Step 4
Review the full preview before saving the result or spending credits on another version.
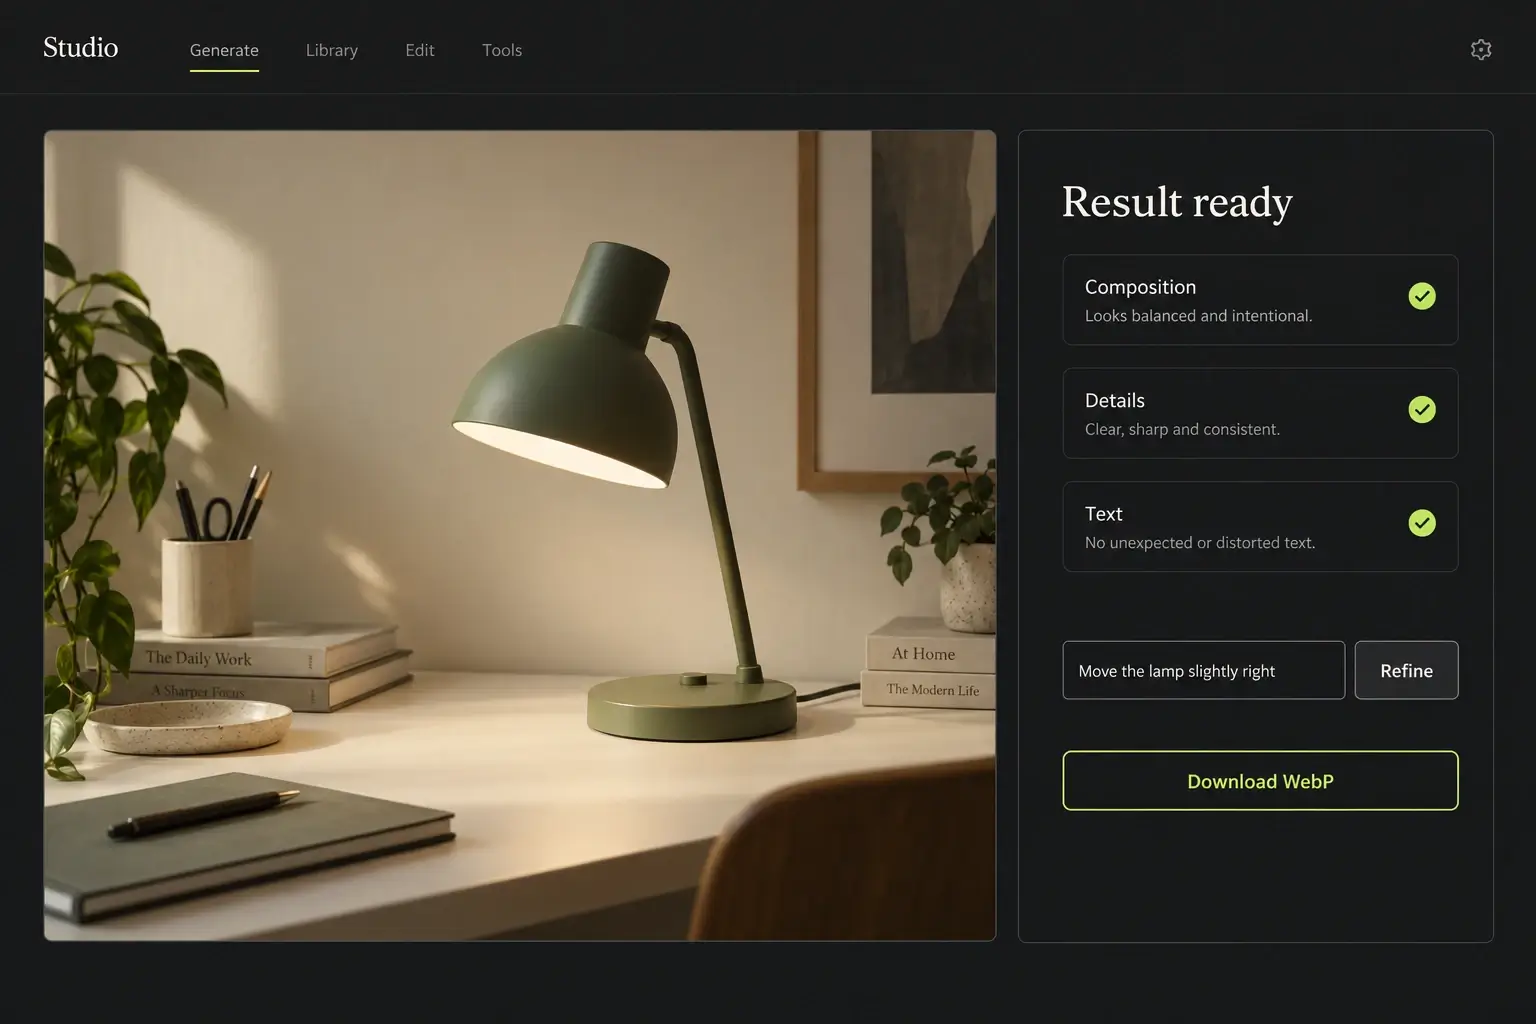
Sign in, read the credit amount on the button, and select Generate. When the task completes, the image appears in the preview area. Open the larger preview and check the main subject, composition, small objects, hands, edges, reflections, shadows, required text, and details taken from your references.
If the image is close, revise one issue instead of rebuilding the prompt. Try: “Move the bottle slightly right. Keep the lighting, stone surface, plant leaves, colors, and camera angle unchanged.” A narrow follow-up is easier to compare and reduces accidental changes to details that already work.
When the image passes your review, use Download. The file extension follows the returned asset type handled by the current download flow. If a cross-domain file cannot download directly, the interface tells you to open the result in a new tab and save it manually. Keep the image, prompt, and settings together when you may need to reproduce the asset.
Compare Flare and Sunburst costs before matching the model, quality, and resolution to the stage of your image.
Available for text-to-image creation and reference image editing.
| Quality | 1K | 2K | 4K |
|---|---|---|---|
| Low | 1 credits | 1 credits | 2 credits |
| Medium | 1 credits | 2 credits | 3 credits |
| High | 3 credits | 4 credits | 7 credits |
| XHigh | 5 credits | 7 credits | 12 credits |
| Max | 9 credits | 15 credits | 25 credits |
Available for text-to-image creation and reference image editing.
| Quality | 1K | 2K | 4K |
|---|---|---|---|
| Low | 1 credits | 2 credits | 2 credits |
| Medium | 1 credits | 3 credits | 3 credits |
| High | 3 credits | 4 credits | 7 credits |
| XHigh | 5 credits | 7 credits | 12 credits |
| Max | 9 credits | 15 credits | 25 credits |
The current Free Starter option lists 10 credits for $0. Those credits can cover up to ten 1K Low attempts with either model, but fewer attempts at higher settings.
Draft first and finish second. Test the subject, layout, and prompt at 1K Low. Increase quality or resolution after the direction is close, then confirm the live Generate button before starting.
Answers about access, prompts, reference-image editing, settings, credits, review, and downloads on gptimage.tools.
Open the Generator page on gptimage.tools. The workspace contains Flare and Sunburst model options, Text to image and Image Edit modes, a prompt field, ratio controls, five quality tiers, 1K, 2K, and 4K resolution, a Generate button, a preview, and a download control. You can review the workspace before signing in, but generation asks an unsigned visitor to sign in.
Start with the asset type and main subject, then add the setting, composition, lighting, colors, exact visible text, and constraints. Put required wording in quotation marks. Replace vague descriptions with visible facts such as “soft window light,” “matte black surface,” or “headline in the top third.” If the result is close, change one item and list what must remain unchanged.
Yes. Select Image Edit, upload at least one reference, and describe what should change. The workspace accepts up to 16 references. Give each image a role when you use more than one, then add a Keep list for identity, proportions, framing, lighting direction, or other details that must remain stable.
The workspace includes fifteen ratios: 1:1, 3:2, 2:3, 3:4, 4:3, 4:5, 5:4, 9:16, 16:9, 21:9, 2:1, 1:2, 3:1, 1:3, and 9:21. Choose the ratio before generation so GPT Image 2.5 composes for the final shape. A wide canvas reserves horizontal space, while a vertical canvas provides room for a standing subject or mobile placement.
Use Low quality and 1K for early prompt and composition tests. Choose Medium, High, XHigh, or Max when the direction needs more detail, and move to 2K or 4K when the output size matters. Check the required credits on the Generate button after every model, quality, or resolution change.
The current Free Starter option lists 10 credits for $0. Under the current map, a 1K low-quality generation costs one credit, while higher settings cost more. Generation requires sign-in. Treat the starter credits as a one-time allocation and check the live pricing and generator controls before starting.
Open the larger preview and inspect the image at the size you plan to use. Check required text character by character, then inspect hands, object edges, repeated patterns, reflections, shadows, labels, and reference details. Confirm that the composition still fits the selected ratio and no unwanted objects or text appeared.
Try Download after the preview has loaded. The client fetches the returned image and creates a local download. A cross-domain host can block that direct fetch. In that case, follow the interface message, open the result in a new tab, and save it manually.
Next step
Start with a 1K Low draft, inspect the preview, and increase quality or resolution only when the composition is ready.